Ornaments for 2013
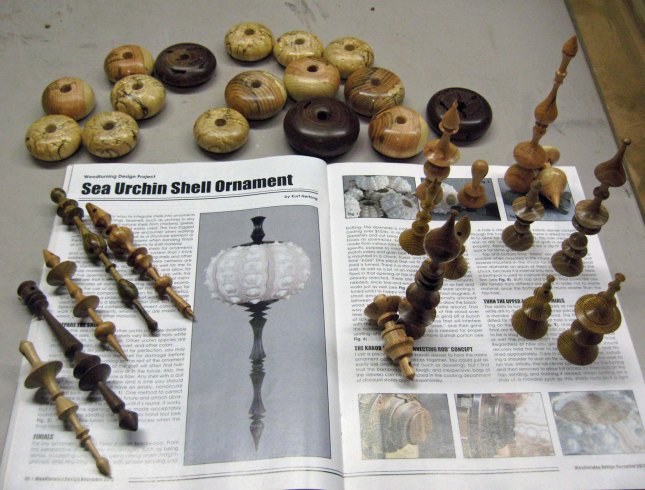
I’m back in the swing of making ornaments again for this Christmas season. After working on large items like bowls for most the year it takes a bit to transition to the fine detail required for Christmas ornaments. This year after reading an article by Kurt Herzog published in the December issue of Woodturning Design I thought I would try a slightly different approach to shaping my ornaments. As I had shown in past blogs I normally shape the top and bottom portion of my ornaments at the same time with a drive spur. This method is quicker and wastes less material but you are compressing the wood so if you get too thin it wants to flex and break. As you can see from what I have made so far Kurt’s method allows for a lot more detail and design flexibility.
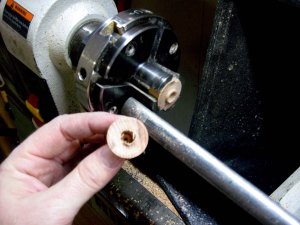
I don’t use sea urchin shells for fine but the idea of using a separate dowel to connect all the pieces seemed like an idea worthy of trying. The first lesson I learned is that drilling 1/4″ to 3/8″ into the planned body is about right, it is also very important to mark where the bottom of the hole is. Next you flip the blank over and grab on to the foot that you just finished turning. Before I tighten the 4 jaw chuck and bring the tail stock up and align it to the center hole left from the initial mounting where I rounded the blank.
 I leave the tail stock in place while I shape the very end of the blank, no sense removing the support before I have to! One of the biggest and most helpful things I took away from Kurt Hertzog’s article is that you finish the ornament in sections. completely turn, sand and finish the last 1-2″ before thinking about the next section. This way you maximize the strength leading up to the area you are working and once you are done with a section you don’t return to it later and possibly snap it off. One thing that worked well for me was taking a small piece of cheese cloth and a hollow tailstock and using that to provide just a little bit of support to the end while I am finishing up the rest of the ornament.
  Ideally the tailstock was loose enough that it didn’t even rotate most of the time I was turning.
  This ornament base was done in about 4 sections. Once I started shaping top of the base I of course had to remove the line showing where the bottom of the drilled hole is. My solution is to make a pencil mark on the tool rest so I can reference it while it I turning. This was the biggest obstacle I had to overcome when I first started trying this method. Only one of the 1st 3 attempts was succesful because I would get too close to the drilled hole and break through. The nice thing with this process is that you end up with two finished surfaces. I do a slight undercut when I part of the piece so that it will fit tightly with the wooden bead that I mate it to.
  All I have to do is clean off the residual splinters and I’m ready to combine components.
Additional lessons learned from this project:
Make sure your 3/8″ drill is really 3/8″, the dowel does not need to be a press fit so you may need to and down the dowel slightly.
Start with a blank that is longer than you think you will need.
Finishing multiple small sections is safer and better than trying to do several inches all at once.
Keep track of hole depth!
You can also check out my ornaments at Skyline Salon if you are in the Kasas City area!

Reblogged this on Birstall Woodturning Club and commented:
Nice job. Several at our club have also been busy on similar lines. A first for us is getting involved in decorating a tree for a charitable event. Hopefully I will have some photos to post eventually.
Can I ask about your photo? It looks like the items in the foreground are floating. I.e not much in the way of shadows. Is it some special flash treatment?
No special flash treatment, just a bunch of workshop lighting. I have two sets of fluorescent lights above the table I had the ornaments on and one above the lathe behind me. I use natural spectrum bulbs above my lathe. I guess when you have lights everywhere there isn’t much chance for shadows. There are pictures of my shop setup in my previous blogs. For my Etsy shop pictures I use a light box with 3 natural light work lights.